Private Cooking Lessons: Client One

Last night I completed my first series of private cooking lessons.  My client and I met three times over these past two weeks, and clocked in about 15 hours of kitchen work.  It was a great learning experience for myself and I'm happy to say for my client too.  I loved creating a customized syllabus of dishes that I knew would work for my client's needs, and seeing her excited and eager to learn.  I think the best thing about learning to cook through private lessons is the fact that it is one on one.  We are in this together and there are truly no wrong questions or answers.  There's no reason to be shy about admitting you don't know how to do something in the kitchen.  I think this makes the person learning a lot more at ease and able to take on their cooking tasks.  I broke this blog post up into the three sessions I had with my client, and through the pictures you can visualize what it would be like if YOU were to be taking lessons and learning some of those cooking techniques you have been dying to master ;)

Session One:

For session one we made chicken salad over a garden salad, a cucumber salad with roasted salmon and a fruit salad.  We also made a classic vinaigrette and a tarragon dijon sauce to go with the salmon.  All very basic but very useful skills…

For session one we made chicken salad over a garden salad, a cucumber salad with roasted salmon and a fruit salad.  We also made a classic vinaigrette and a tarragon dijon sauce to go with the salmon.  All very basic but very useful skills.   

We began the night seated in the dining room going over printouts that my client took home with her that included basic knowledge like what tools and equipment you should have in your kitchen, the types of knives you should use, along with other hel…

We began the night seated in the dining room going over printouts that my client took home with her that included basic knowledge like what tools and equipment you should have in your kitchen, the types of knives you should use, along with other helpful information she can now refer to when she needs it.  In the kitchen we sharpened knives, and learned all of the different knife cuts, and how to clean and cut different kinds of fruits and vegetables.

The Fruits of our Labor, if you will.

The Fruits of our Labor, if you will.

Session One is always going to be a lot of work, not a lot of glory.  You are learning very important skills in the kitchen that may not be too exciting, but they will make you a better cook and they are very necessary to learn.  We won't cook very much in session one, the focus will be totally skill based, not flavor based, but the following sessions will become fun and exciting and you will definitely taste your achievements!

Session 2: Coq Au Vin

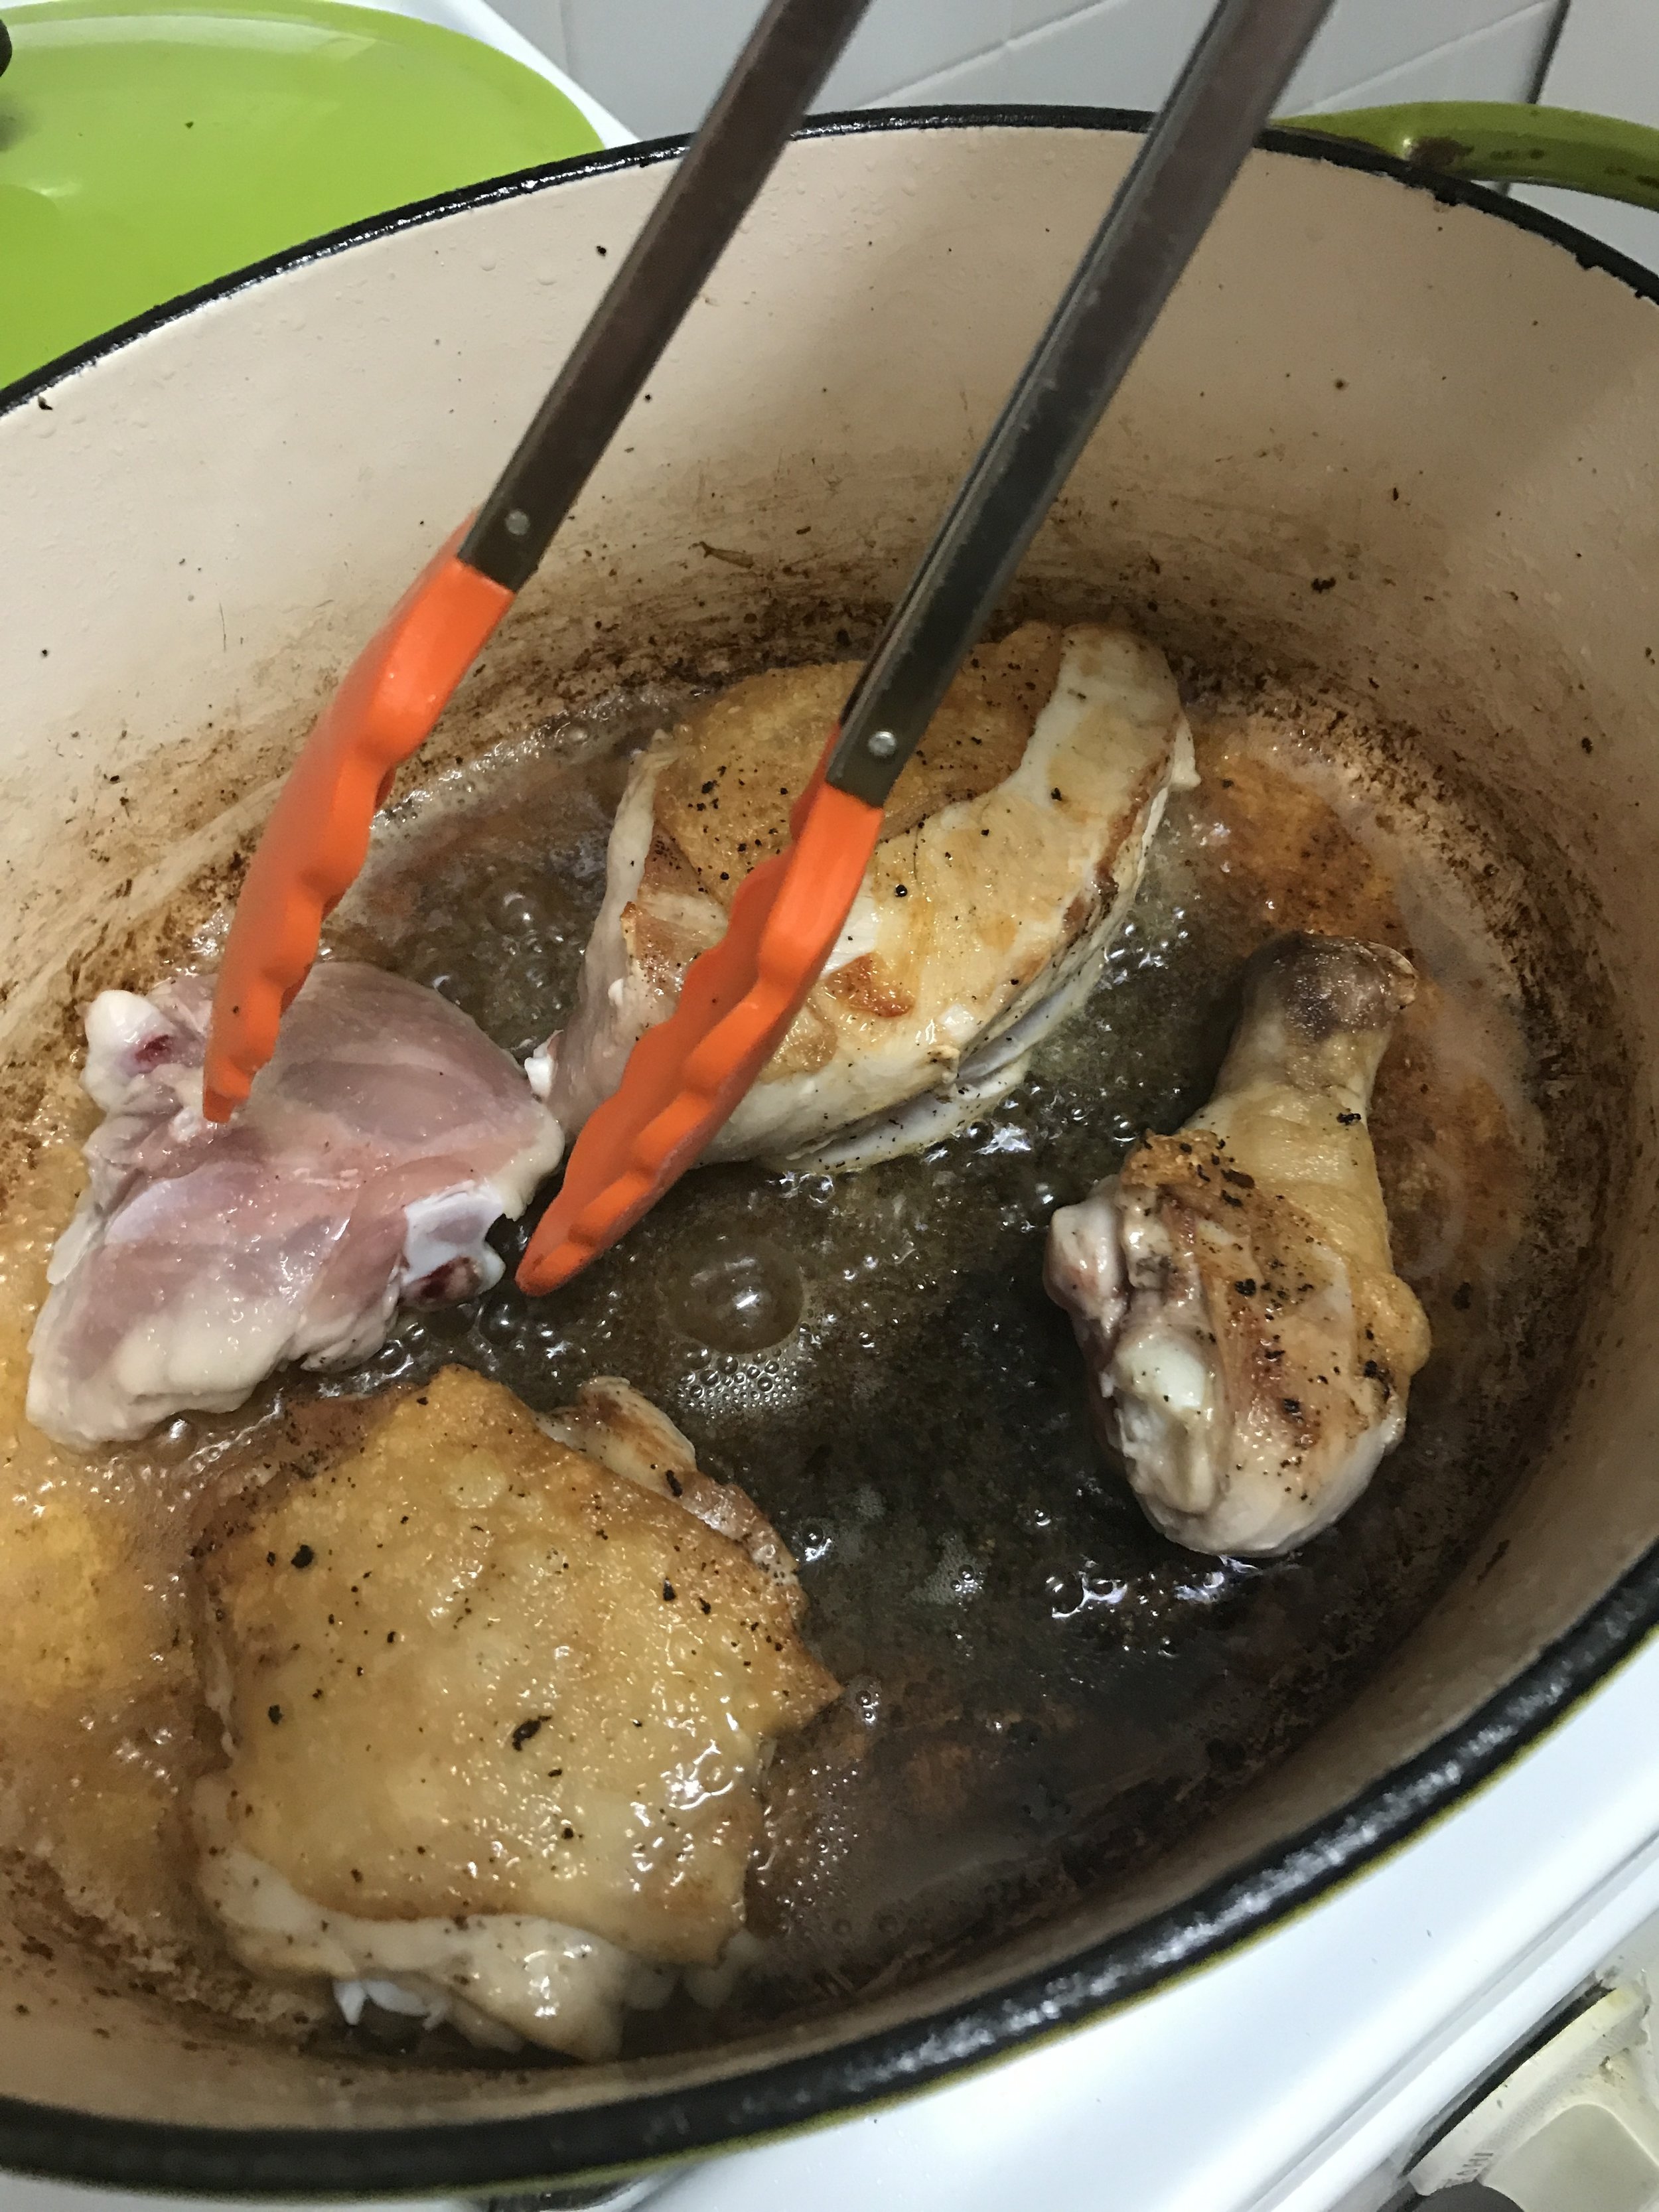
Session two was cooking my version of Coq Au Vin, a manageable yet really delicious dish that is sure to impress your guests, and also make you very proud of yourself.  We started out by breaking down a whole chicken.  Then we sautéed our mushrooms, rendered the fat from some thick cut bacon, browned our chicken in the bacon fat, cooked our mirepoix (onion, celery and carrot) and added our braising liquid, some seasoning and the browned chicken to braise in the oven.  Once the chicken is done, we remove it, strain the sauce and reduce it while skimming the excess fat off the top.  My client did a great job and handled all of these directions very well.  I also think she plated the dish very nicely, I gave her full freedom with it.  It was a session that we both felt really happy with.

Session 3, 6 hours of cooking:

Our first recipe was a turkey sausage and sweet potato hash with a poached egg.  Our session took place on a Sunday afternoon, so we started with a little brunch.  A hash is a great thing to learn, because it is so versatile.  Once you learn how to dice and chop you can come up with endless combinations of ingredients.  Poached eggs are also a great egg to learn how to properly cook.  They are healthy but taste decadent, and really what beats that?

The next recipe was an Italian meatball cooked in a nice spicy marinara sauce over some creamy polenta.  We had a lot of fun making this dish, and I think this was my client's favorite dish, to cook and to eat.  It's such a satisfying and comforting dish it was hard not to eat a bunch of it and call it a day ;)  This is a great meal to learn and have in your repertoire, you can cook it early in the week and make a couple of meals out of it.  It's also a crowd pleaser.

Next up was some grilled zucchini with a lemon, caper and mint dressing.  My client did a great job grilling the zucchini and she loved learning to make supremes with the lemons.   This was a fast dish that turned out really well that taught her some good techniques to learn.  

Last but not least was the risotto.  We made our own seafood stock and prepped all of the components, this is known as mise en place.  It's good to train yourself and spend time prepping all of your ingredients before you begin to cook, and your food will turn out that much better.  We seared the scallops, made the risotto and plated it.  We enjoyed a nice bottle of wine, the risotto and zucchini and discussed our sessions.  My client took notes throughout and she knows she can always email me with questions. 

As I said in the beginning of the post, we both were very happy with the way things turned out and it was great to see my client grow and learn in such a quick amount of time.  I wish her the best of luck in her future cooking endeavors!

Saffron Risotto With Mussels, Pancetta & Asparagus

Today I made a saffron broth that I used in a seafood risotto as part of my recipe prepping for one of my at-home cooking lessons I am giving next Sunday.  Risotto is a great dish to learn to cook because so many people can eat it, and the flavor combinations are endless.

saffronrisotto.JPG

To make the saffron broth I started by boiling shrimp shells and some fresh parsley in water for about 15 minutes, and then simmering mussels in the liquid until the shells opened.  Once I took the mussels out of the liquid, I let the broth cook for another 15 minutes while I removed the mussels from their shells to save for the risotto. I strained the broth twice, put it back in the pot and let it simmer with about 7 strands of saffron for another 15 minutes.  I shut the heat, and covered the pot until it was ready to be used for the risotto.  I yielded about 3 cups of saffron broth.

To prep for the risotto, I diced a large sweet onion, chopped some parsley to finish the dish with, measured out 1 1/2 cups of risotto, diced my asparagus and sautéed them in some olive oil and a little salt for a few minutes, you don't want to overcook your asparagus because it will cook in the risotto for a little while at the end.

Once your ingredients are prepped, you want to start by crisping the pancetta in your pan and rendering that fat to use to cook your onions in.  Choose a nice big saute` pan that has high walls, this will make your risotto stirring a lot easier and cleaner.  Once you are happy with the pancetta, remove it and add the onions and cook until translucent.  Add your dry risotto and cook the risotto and onions together for abut 3 minutes.  This kind of opens the pores up and readies the risotto for all of that liquid it's about to soak up.  

Now, the stirring begins...I start with around 3 ladles worth of the saffron broth.  Just so the risotto is almost submerged and you want to stir and swirl the risotto around in the broth, almost like making figure eights.  Keep a close eye on it, and you want to almost be constantly stirring.  The heat should be about medium, and adjust it if you think it is cooking too fast.  You also want your stock to be hot, but not simmering.  Once the rice has almost completely soaked up all of that liquid, pour in another 3 ladles full and keep stirring it.  Again, when all of the liquid is almost completely soaked in, add another 3 ladles full.  At this point I like to taste it to see where the rice is at and how the salt is.  Adjust your seasoning and keep doing this liquid process until the risotto seems to have the proper cook and consistency.  At this point I shut off the heat and added the remaining ingredients:  the asparagus, pancetta, parsley and mussels, plus a little bit of earth balance vegan butter and freshly ground black pepper.  I kind of folded the ingredients gently, not to bruise the mussels.  

I loved this dish, my husband not so much because he just isn't crazy about seafood.  I love shellfish and saffron, I'm a sucker for it.  If you are too, try this recipe, it's easy and satisfying.  

Risotto in saffron broth with asparagus, pancetta and mussels.  Gluten and Dairy Free.

Risotto in saffron broth with asparagus, pancetta and mussels.  Gluten and Dairy Free.

Lazy Sunday Vegan Pizza

It's that time of year here in NYC when we find ourselves between seasons.  Summer is over, but we still keep getting some hot days.  Football is on but we still keep getting some late season summer produce.  We had a busy weekend, so today I made a fast, simple and 'lazy' dinner. We had store-bought gluten free pizza crusts, locally made vegan pesto from Gotham Greens and a couple different vegan cheeses in the refrigerator, so I decided we should have a kitchen sink pizza.  We stopped by our neighborhood Sunday farmer's market and picked up some organic heirloom tomatoes, an eggplant and spinach.  

veganpizza.JPG

We had store-bought gluten free pizza crusts, locally made vegan pesto from Gotham Greens and a couple different vegan cheeses in the refrigerator, so I decided we should have a kitchen sink pizza.  We stopped by our neighborhood Sunday farmer's market and picked up some organic heirloom tomatoes, an eggplant and spinach.  

When it was time to make the pizzas, I sautéed the spinach in garlic and olive oil and placed it in a bowl, and then added diced eggplant that I tossed in olive oil, Sicilian chili oil and red wine vinegar to the pan to saute`.  Chao vegan cheese slices are really really good, and I need to stop buying them!  They are officially my favorite vegan cheese product out there because they melt well and they don't have an odd after taste that some of them seem to have.  I halved and placed two slices on each pizza crust along with four slices of heirloom tomatoes per crust and put that into a 375 degree oven.  While that baked in the oven, I shredded a quarter of a block of Daiya jalapeño havarti cheese into my Gotham Greens vegan pesto and mixed it together.  I took the crusts out and added teaspoon sized dollops of the pesto/cheese mixture throughout the crust and then added the diced eggplant and through it in the oven for around 5 more minutes to continue cooking.  At the end I added the spinach to the pizzas and let that back for about 5 more minutes.  

It was nice to take advantage of the end of summer produce and also empty out our fridge and get help from some store-bought ingredients.  My kind of lazy Sunday!

veganpizza1.JPG

Chilled Avocado Soup

Chilled Avocado Soup is a summertime staple, but also something you can have in the wintertime when you happen to have some good avocados and a hankering for something light and summery to beat those winter doldrums.   There are so many spins and changes you can make to this recipe, like adding green grapes or honeydew, but this is a great start to a well-balanced hearty and refreshing avocado soup.

chilledavocadocoup.JPG

Ingredients:

  • 2 Avocados
  • 1 deseeded cucumber
  • 1 Granny Smith apple
  • the juice of 2 limes
  • 2 deseeded jalapenos
  • 1/4 cup of chopped cilantro
  • 1 1/2 cups water
  • 1/4 cup of rice wine vinegar
  • 2 tsp salt
  • 1/2 tsp ground ginger
  • 1/4 tsp cayenne
  • 1/4 tsp cumin
  • 1 tsp honey or agave nectar

Roughly chop any of fruits and vegetables and then blend all of the ingredients together until smooth.  I usually use our Ninja or my Cuisinart.  You want to chill this soup for a minimum of 2 hours.  I like to stick the ninja pitcher right inside the fridge so when I taste it after it is chilled I can add an ingredient to it and blend it up, say I decide it needs a little more acid or salt or sweetness.    This can feed 4 people as a starter or 2 people as a hearty gluten free and vegan meal.

Recipe Testing

Recipe Testing

Coq Au Vin

Last week I began to prep for my first at-home cooking lessons that are starting at the end of next week.  I took out and defrosted a whole chicken that has been chilling in my freezer the past couple of weeks.  First I broke it down into it's 8 parts and let them dry out on racks in the fridge while I made some stock out of the backbone.  Then I began work on my version Coq Au Vin, which is one of the dishes I plan to teach my 'student' on our second session.  

It's a pretty simple version of Coq Au Vin that some may scoff at, but it tastes good and it's fast enough to cook anytime.  

First I sauté and then remove some extra thick cut bacon and then brown the (well salted and dried) chicken in the hot bacon fat.  I remove the chicken and add my mushrooms to saute` and removed them and then added my clery and carrots.  After a few minutes I add my red wine, stock, some tomato paste and a couple sprigs of thyme.  When the liquid gets hot, I taste and season.  I put back the chicken, cover the pot and put it in a 300 degree oven for 30 minutes.  My chicken was kind of a skinny bird, so after 30 minutes it was cooked through.  I removed the chicken and strained the sauce twice.  I put it back into the pot and let it thicken up and skimmed the extra fat from the sauce.  I added the mushrooms, bacon and chicken and let it all stay warm in the oven uncovered while I made my dairy free mashed potatoes: boil Idaho potatoes in salted water, put them through the food mill and add vegan butter, almond milk and some olive oil, salt and pepper.  Creamy, delicious, no stomach aches!  

Plate, serve and enjoy!

Rendered Bacon

Rendered Bacon

Browned Chicken

Browned Chicken

Sautéed Vegetables

Sautéed Vegetables

Coq Au Vin over mashed potatoes.  Gluten and Dairy Free.

Coq Au Vin over mashed potatoes.  Gluten and Dairy Free.